Synology NAS Cookbook-4: How to Access by HTTPS 中文版
Introduction
Following the previous tutorials, you’ve likely been impressed by the powerful capabilities of Synology NAS. If you’ve already taken the plunge and set up your own unit, the next pressing question is: how do you securely access your data over the public internet?
This article will first provide a concise overview of the fundamental principles behind secure internet access using HTTPS, aimed at helping curious users understand the underlying concepts. Then, we will dive into the settings available within Synology’s DSM to configure HTTPS access. Since this may involve your specific network topology, some adjustments might be needed based on your actual setup.
Let’s get started.
How Secure Network Access Works
Think of accessing the internet like delivering a package. As a delivery driver, you need to solve three core problems:
- How to locate the recipient.
- How to reach the recipient’s location.
- How to ensure the package’s safety.
How to Locate the Recipient
In any network, unique identifiers are needed to mark each entity. On the internet, this identifier is the IP address. Since IP addresses are numerical codes, we typically use the Domain Name System (DNS) to map these numbers to human-readable letters for easier memory. For example, by entering the following in the command line:
1 | > dig google.com.tw |
From the result, we can see that the domain google.com.tw maps to the IP address 172.217.1.131.
In a browser, we typically access websites by entering their domain names.
Notes on DDNS
When discussing DNS, we must mention DDNS (Dynamic Domain Name System). Most home internet connections use dynamic IP addresses assigned via protocols like PPPoE, meaning your public IP address can change. DDNS is a service where a client running on your local network notifies a DNS provider whenever your public IP changes, ensuring your domain name always points to the correct current IP address.
How to Reach the Target
Data transmission across the internet is quite similar to routing packages through various logistics hubs. Each router acts as a station, determining the next hop for a data packet based on its destination IP address. These routers are organized in a hierarchical, tree-like structure, each responsible for a specific “area,” much like provincial, city, and district divisions in the physical world.
As this is not the main focus of this article, please refer to resources on TCP/IP for implementation details.
How to Ensure Security
Security here refers to ensuring that the data we transmit is not eavesdropped on or tampered with.
Your first guess is probably encryption—bingo! Correct. HTTPS is indeed an encryption-based transmission protocol. Simply put:
- It uses Asymmetric Encryption to verify identities during the initial connection handshake and to transmit a randomly generated session key.
- This session key is then used to encrypt the content at the sender’s end, which is then decrypted at the recipient’s end after transmission.
This brings us to the crucial concept of Asymmetric Encryption. It uses a pair of keys: a public key (shared openly) and a private key (kept secret). Information encrypted by one key can only be decrypted by the other, enabling two primary use cases:
- Digital Signatures: An individual or organization calculates a hash (digest) of a message and encrypts this hash with their private key to create a signature. The message and signature are published together. The public can verify the message’s authenticity and integrity by computing the hash of the message and comparing it to the decrypted hash (using the corresponding public key).
- Secure Transmission: Information is encrypted using the recipient’s public key. Only the holder of the corresponding private key can decrypt it, ensuring security during transmission over insecure channels.
Furthermore, when a trusted Certificate Authority (CA) uses its private key to encrypt a website’s public information (like its domain name and public key), it creates a digital certificate for that website.
When you access a website via HTTPS, the site sends its certificate to your browser during the connection setup. The browser then verifies the certificate’s validity using the pre-installed public keys of trusted CAs, thereby confirming the authenticity of the website’s public information.
Therefore, the key to securely accessing your Synology NAS via HTTPS lies in obtaining your own domain certificate.
How to Obtain a Domain Certificate
Purchase a Domain
To establish your unique presence online, users in Mainland China can purchase a domain from providers like Alibaba Cloud. For personal use, international registrars like Name.com are often recommended for their simplicity.
Get a Domain Certificate
Currently, obtaining a free certificate from Let’s Encrypt, valid for three months, is a very economical option. As shown in Figure 1, Synology DSM provides a wizard to guide you through generating a Let’s Encrypt certificate (check the DSM help documentation for details). However, a limitation for many home users in Mainland China is that Synology’s wizard typically requires verifying domain ownership via port 80, which is often blocked by ISPs.

To work around this, you can explore methods for automated certificate deployment on Synology NAS, which might be covered in a separate article.
Built-in External Access Methods in Synology
Before diving into the methods, to enforce HTTPS, please enable the “Force HTTPS connection” option in the Control Panel (Figure 2):
QuickConnect
QuickConnect is an external access service provided by Synology, known for its simple setup and reasonable efficiency. It’s the default method used by Synology’s mobile apps (like Drive and Photos) to connect to your NAS. Note that users in certain regions may need to register a mobile phone number to use this service.
Configuration Steps
Create a QuickConnect ID:
First, you need to create your unique QuickConnect ID and enable the service in the settings panel, as shown in Figure 3.
Configure Custom Domain and Port (Optional):
If you have your own domain, you can configure it in the settings panel shown in Figure 4.
Figure.4 Domain and Port
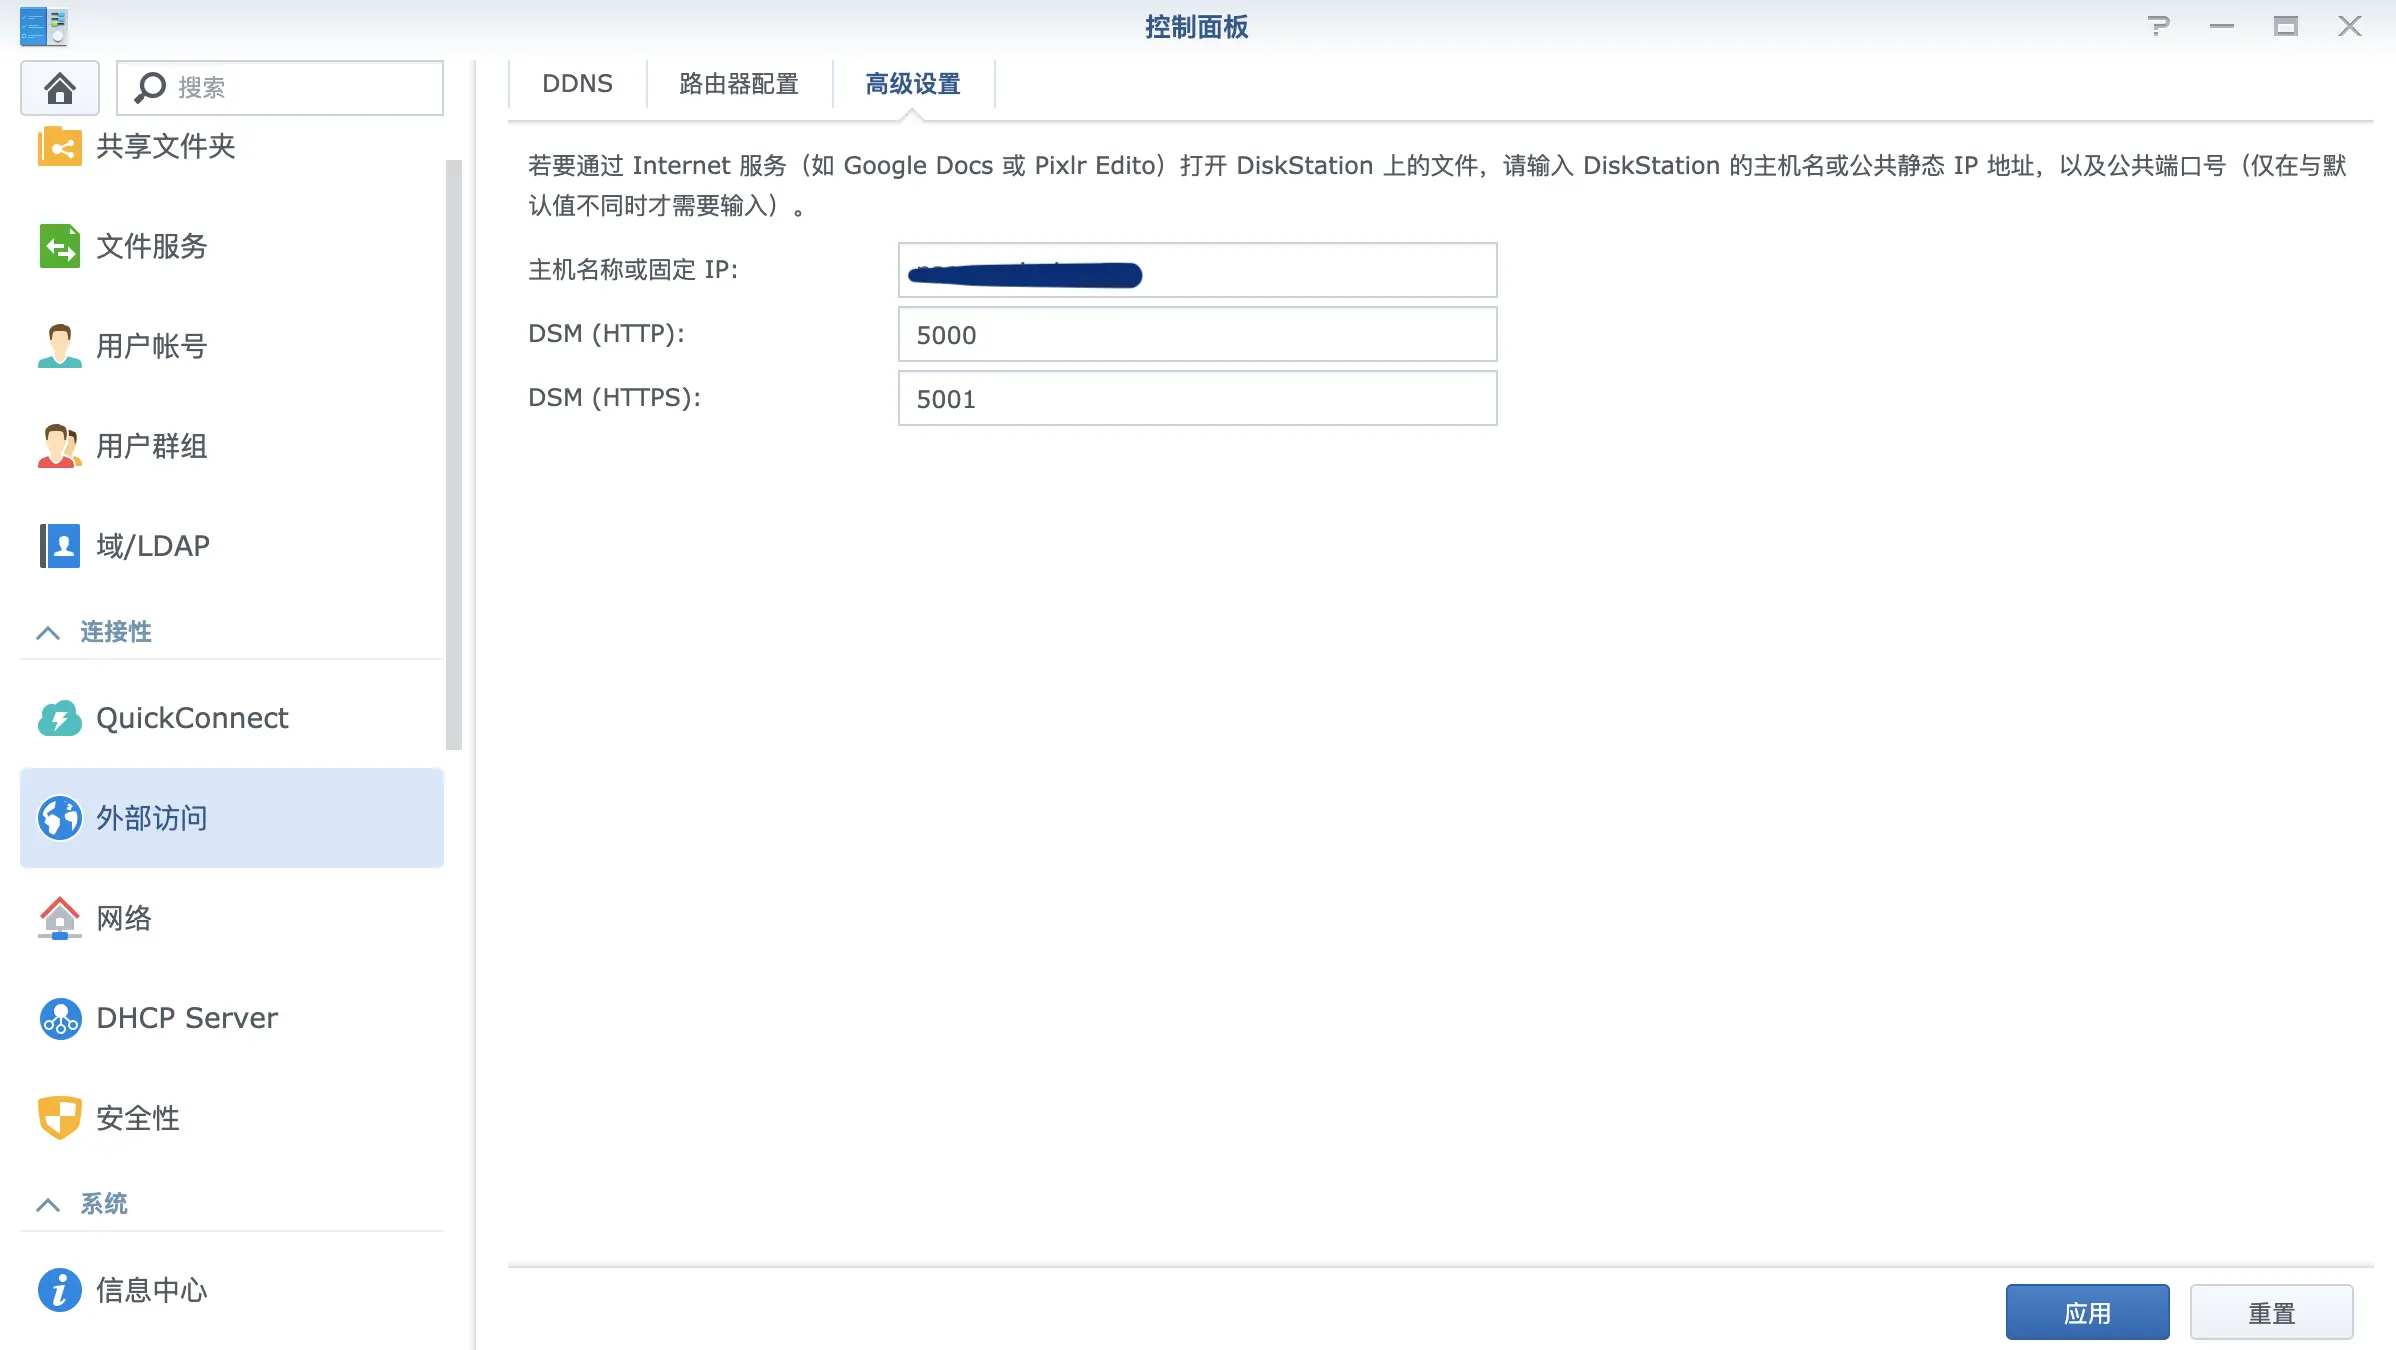
After these simple steps, you can access your NAS via a browser using addresses like http://quickconnect.to/your_id or http://your_id.quickconnect.to.
How it Works
According to its whitepaper, QuickConnect employs a relay and fallback strategy to facilitate communication between the external client and your NAS.
- During the setup above, information about your NAS’s network environment (like external domain/port, internal/external IP) is synchronized with Synology’s QuickConnect servers.
- When a client browser initiates access, a script (Serv.php) retrieves this information and makes a decision:
- 1 If the NAS is reachable on the local network (LAN), it redirects to an address like http://192.168.x.x:port.
- 2 If not, but an external domain is configured, it attempts access via https://your_domain:port.
- 3 If that fails, it tries Hole punching to establish a direct connection between the client and the NAS.
- 4 If all else fails, it uses Synology’s relay service, where data is routed through Synology’s servers. In this case, the address remains your_id.quickconnect.to.
It’s important to note that methods 2.1, 2.2, and 2.3 establish a direct connection between the browser and the NAS. Method 2.4 involves two connections (NAS to Synology server, and Synology server to your browser), which can introduce at least double the latency compared to direct connections.
Using DDNS
As explained earlier, DDNS ensures your domain name always points to your current public IP. When configured correctly, this allows for efficient direct access to your NAS over the internet. The prerequisite for this method is configuring port forwarding (NAT) on your router to direct incoming traffic to your NAS.
In practice, you can choose either Synology’s built-in DDNS service (Figure 5) or other providers like DNSPod within the Control Panel.
A potential issue arises if your home router uses proxy/VPN services: the DDNS client running on the NAS might detect the proxy server’s IP as your external IP, incorrectly updating your domain’s DNS record. This happens because the IP detection service used by the NAS client might be routed through the proxy. A common workaround is to add synology.com to your SSR’s access list.
Summary
Finally, let’s summarize the various methods for external HTTPS access to your Synology NAS, along with their pros and cons:
| Method | Pros | Cons |
| :—— | :—– | :—– |
| QuickConnect | Easiest setup, integrated into DSM, works without complex router configuration or public IP |
Transfer speeds can be slower, especially when relayed |
| DDNS | Offers higher transmission speeds via direct connection | Requires more complex setup: involves router configuration (port forwarding), owning a domain, and managing a certificate |