Synology NAS Cookbook-2: How to Build Family Data Center(Backup) 中文版
Introduction
After introducing how to choose one suitable Synology NAS model in previous post, I will show the path to build your own family data center by builtin apps of DSM in the following sections:
- Basic:User & Shared Folder
- Backup:PC Data
- Application:File Sync
- Application:Photo
- Application:Video & Audio
- Application:Download
This post is focused on backup, here we go!
Basic: User & Shared Folder
Synology DSM can provide complex control of authority since it is customized base on Linux which inherits the Unix-kind classical account & permission sub-system. It leads to a little boring learning curve especially for residents from Windows. Let’s start with a few concepts:
User
User is the entity used to sign in DSM as well as a minimum unit to carry permissions. Compared with PCs mostly interacted with a single user, platforms like NAS is naturally appropriate for Time-Sharing system (e.g. DSM) to release the power of serving many users currently. Fig.1 shows kinds of users: admin and guest are created by the system while magus0219 is my account.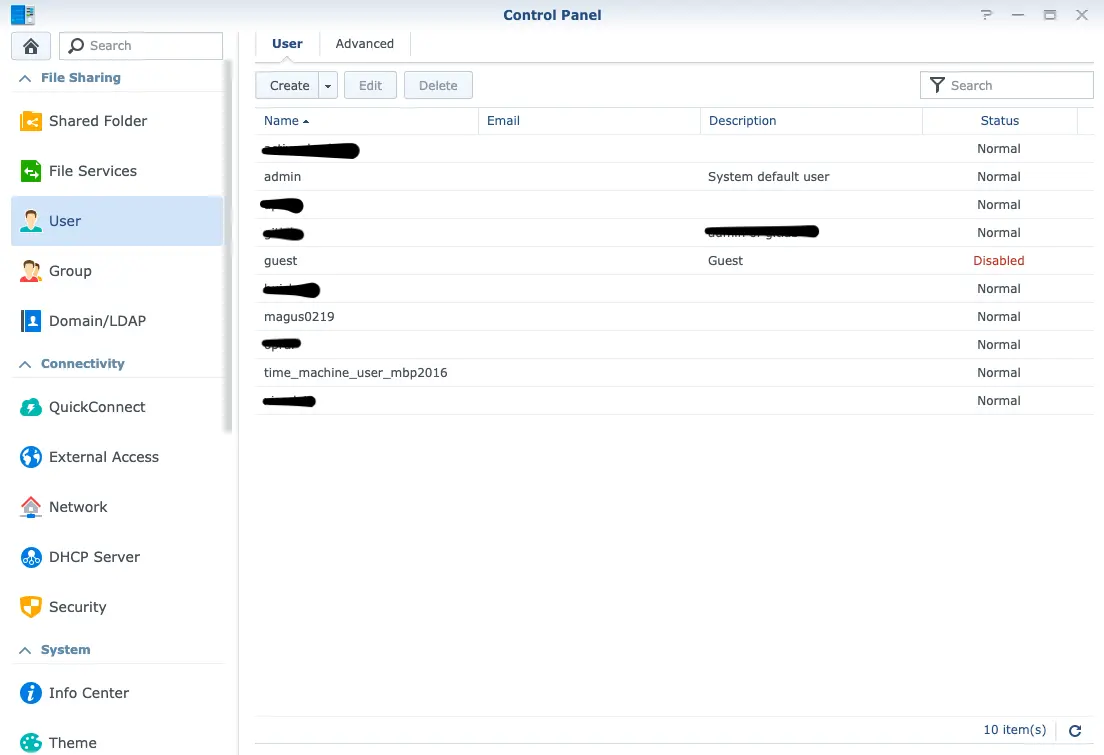
Shared Folder
Shared folders are main objects managed by users. You can find them listing in the left side of File Station(Fig.2) or Tab ‘Shared Folder’ of Control Panel(Fig.3):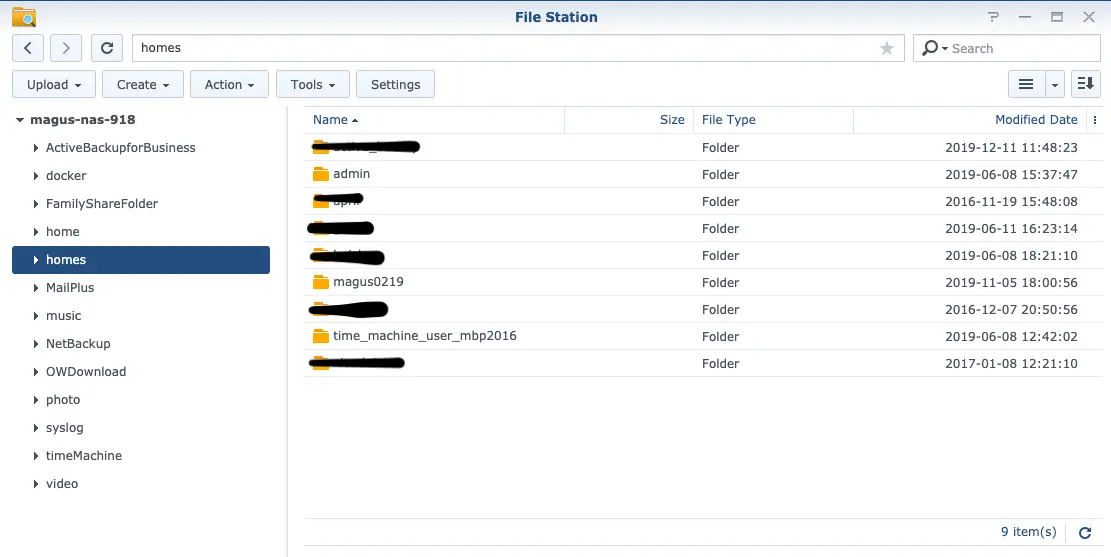
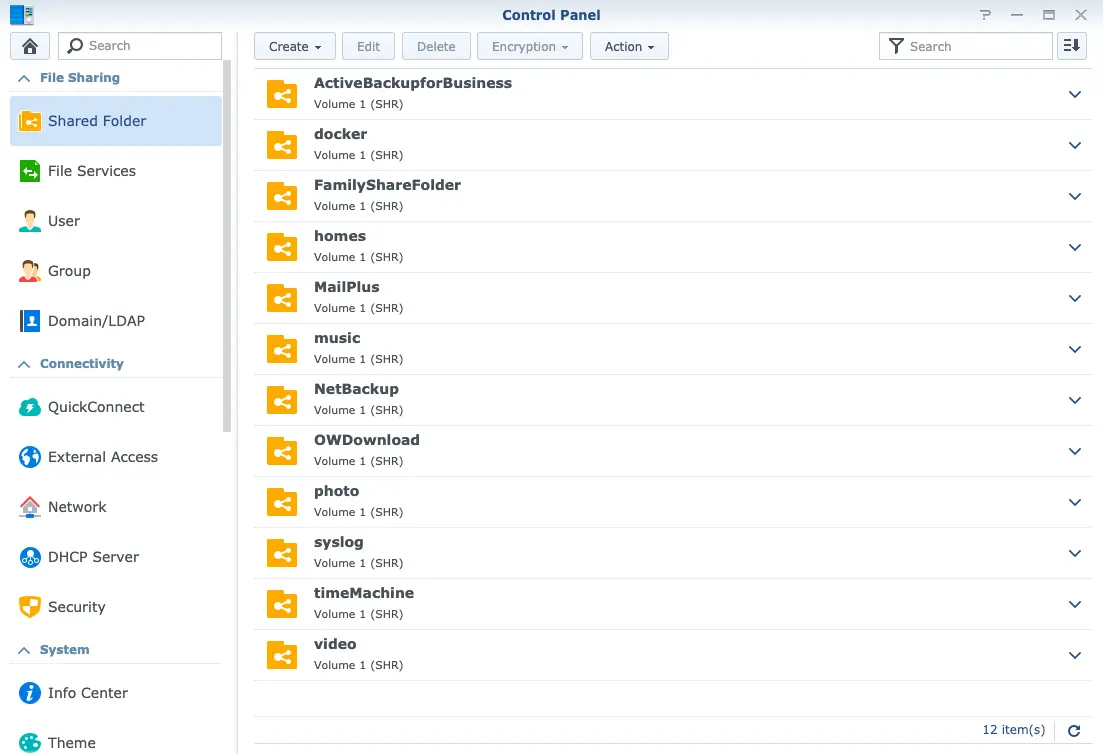
I guess you may observe that there is one additional directory named home in Fig.2 which not existed in Fig.3. Congratulations! You just find the famous Home Directory. Actually this is just a mirror/link of the directory {homes/username} (e.g. mine is homes/magus0219). So everyone has a directory labeled the same name ‘home’ with different content in it(just like Parallel Universe)! By the way, you have the complete control of this directory because ‘Welcome home’!
Permissions
Synology NAS has categories of user permissions as follows:
Folder Permissions
You can set different permissions for each shared folder mentioned above including:
- No Access
- Read/Write
- Read Only
These permissions are self-explanatory. Be aware that they are mutually exclusive. If needed you can customize your own permission(e.g. list folders only) by clicking ‘Custom’ in Fig.4: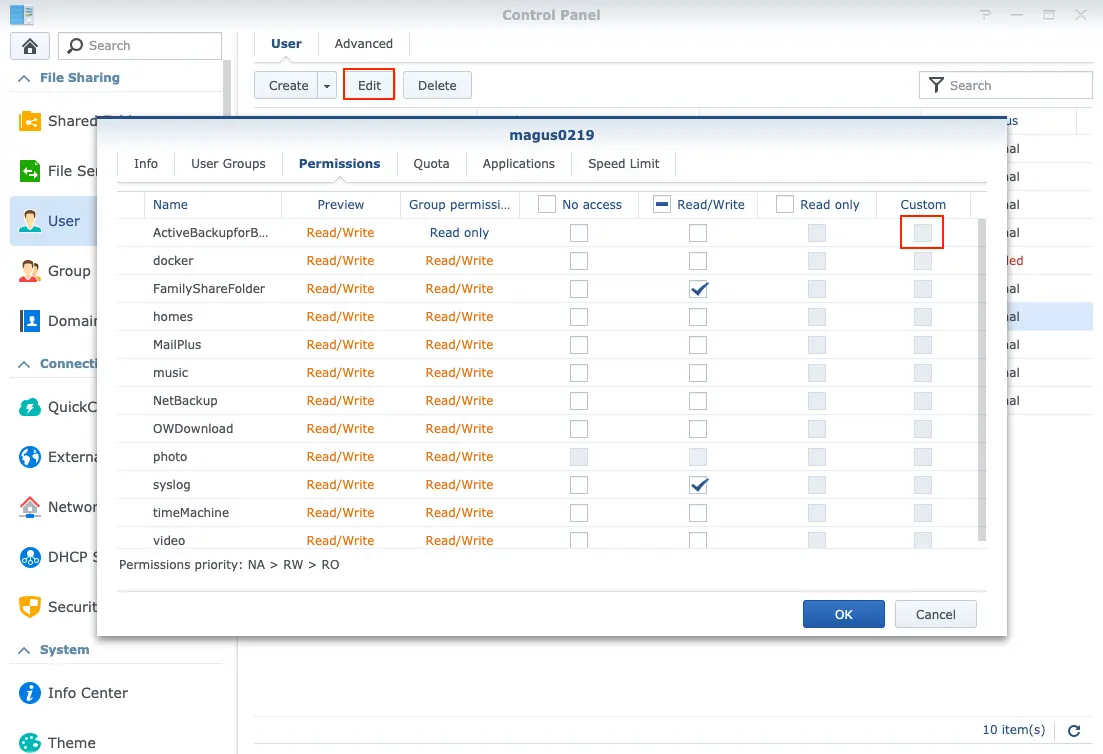
Quota
You can set quota of each shared folder(Fig.5) to prevent from running out of disk space by greedy apps.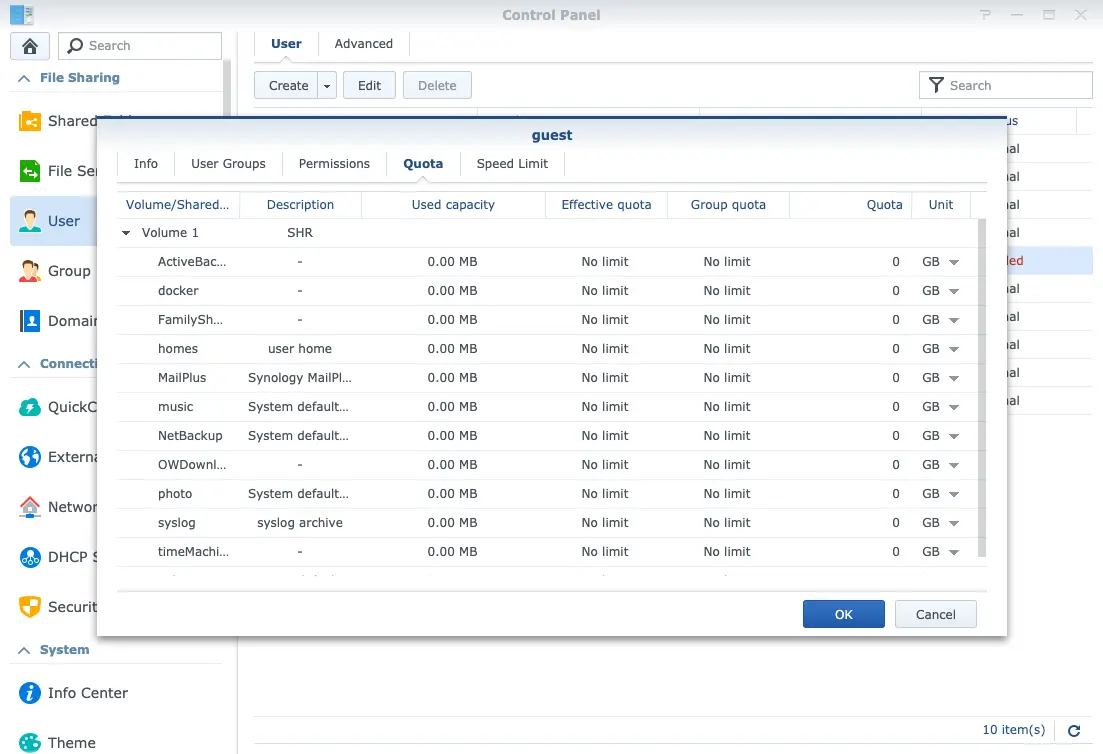
Speed Limit
Other than quota, speed limit(Fig.6) is another useful function if your brother loves BitTorrent! You can even set different threshold for different time frame.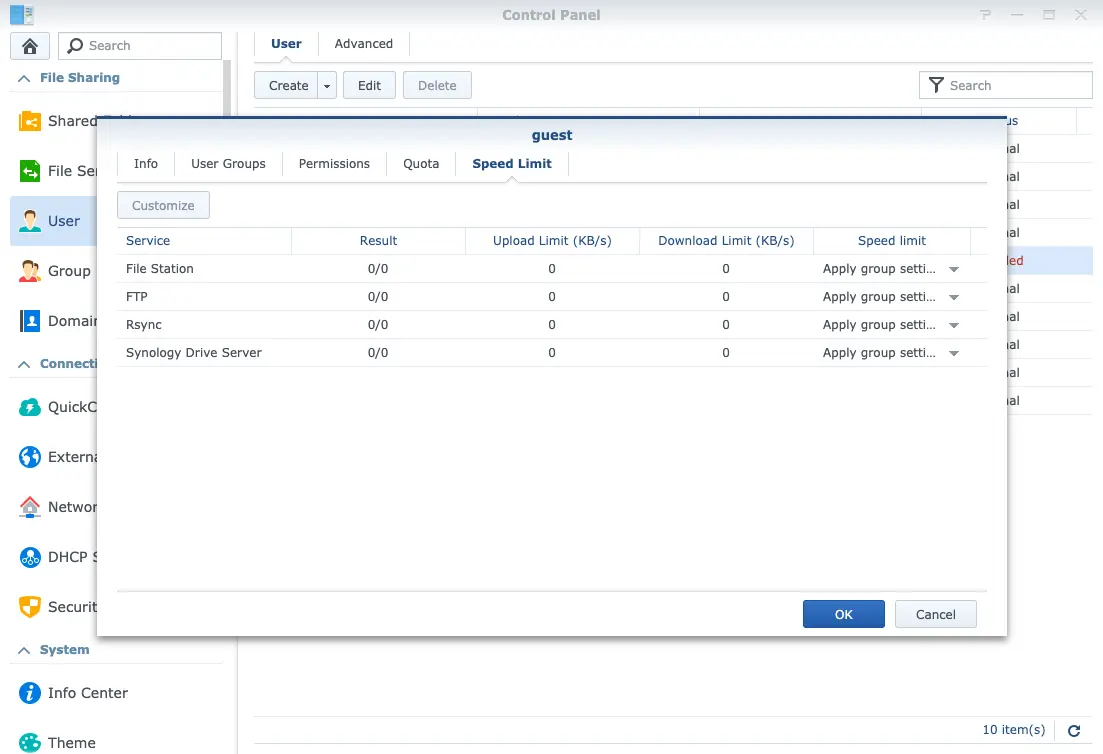
User Group
It’s really boring to set permissions one by one especially in case you have a large number of users. Here comes user group. Grouping your users and set permissions at the group level then all users inherit them. What a time saver! Moreover, you can restrict access to applications in the group panel.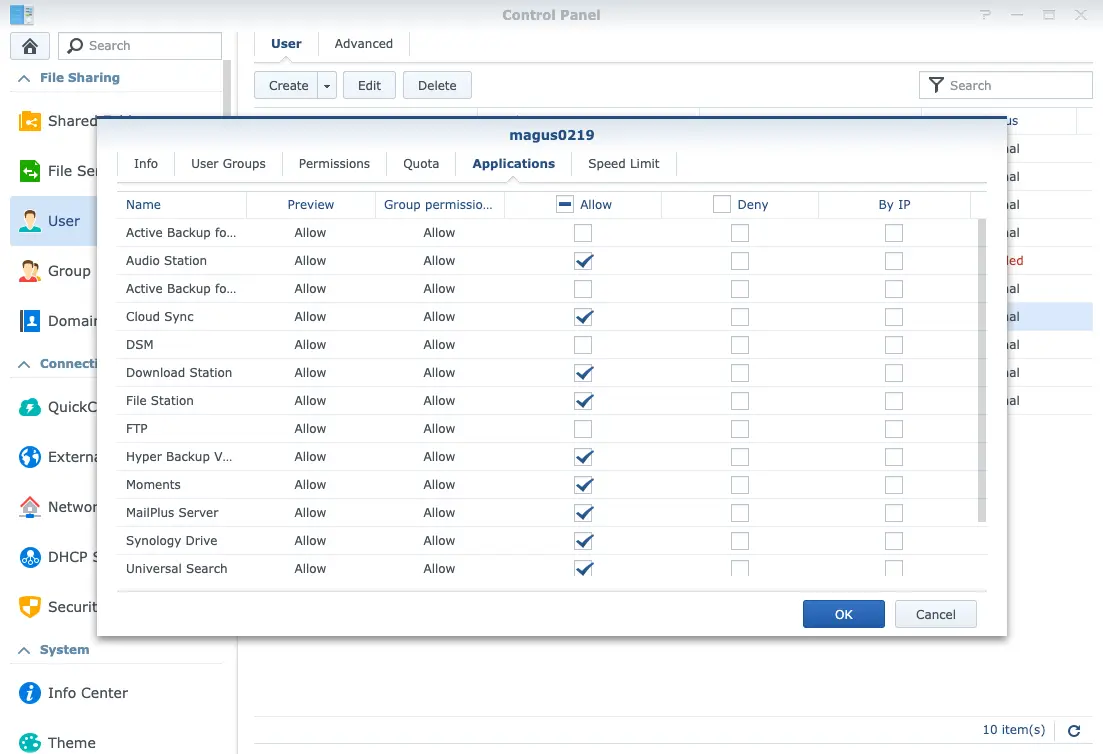
Some notes about user group:
- Every user belongs to a default group named users and no quit.
- One user is able to belong to multiple groups. The system will accept looser permission if configurations of different groups conflict. For example, if Group A has permission to access Application Foo but not Group B then the user belongs to both groups will pass the validation(Logical OR).
- User is the final carrier of permissions, so you can overwrite permissions inherited from groups.
Tip:How to share files?
Once shared folders and proper permissions are set, you can share files through kinds of transport protocols(SMB/AFP/NFS/FTP) in fig.8: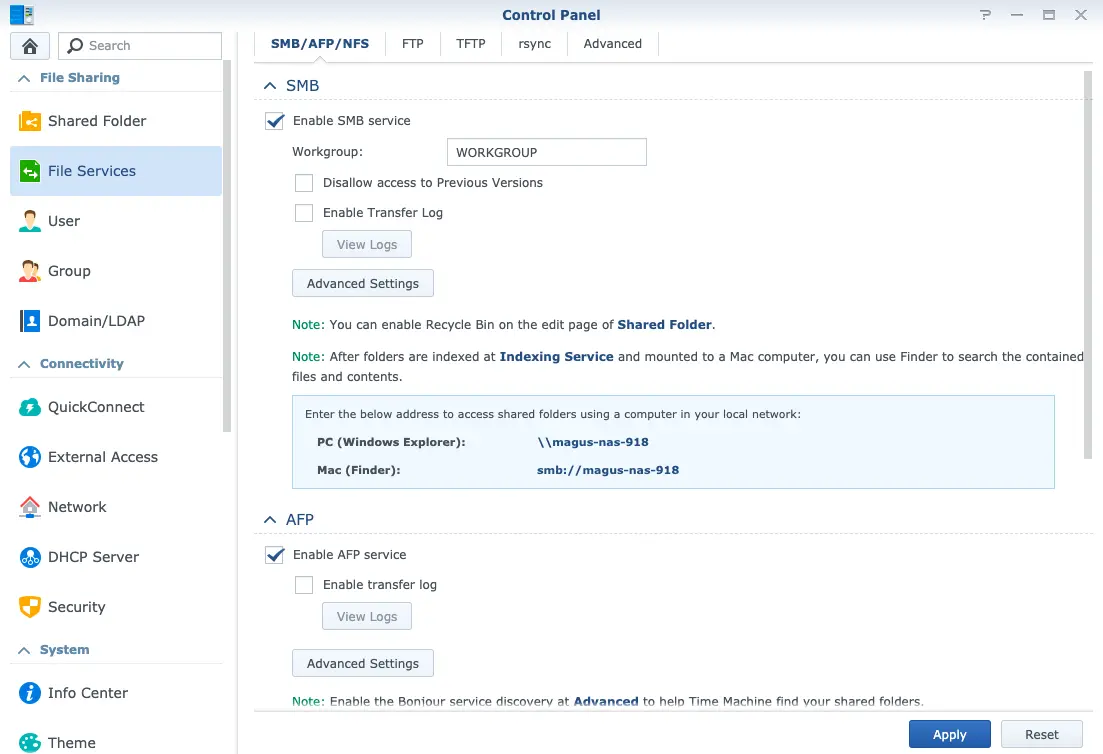
There is another sharing method if you do not want to enable those file services. Right-click arbitrary file/directory in File Station then click ‘Share’ item, you generate a specific short URL or QR code of this object for sharing(Fig.9). Anyone can input this URL in a browser then touch the files. Don’t worry, you can specify the validity period and the number of allowed access to this URL.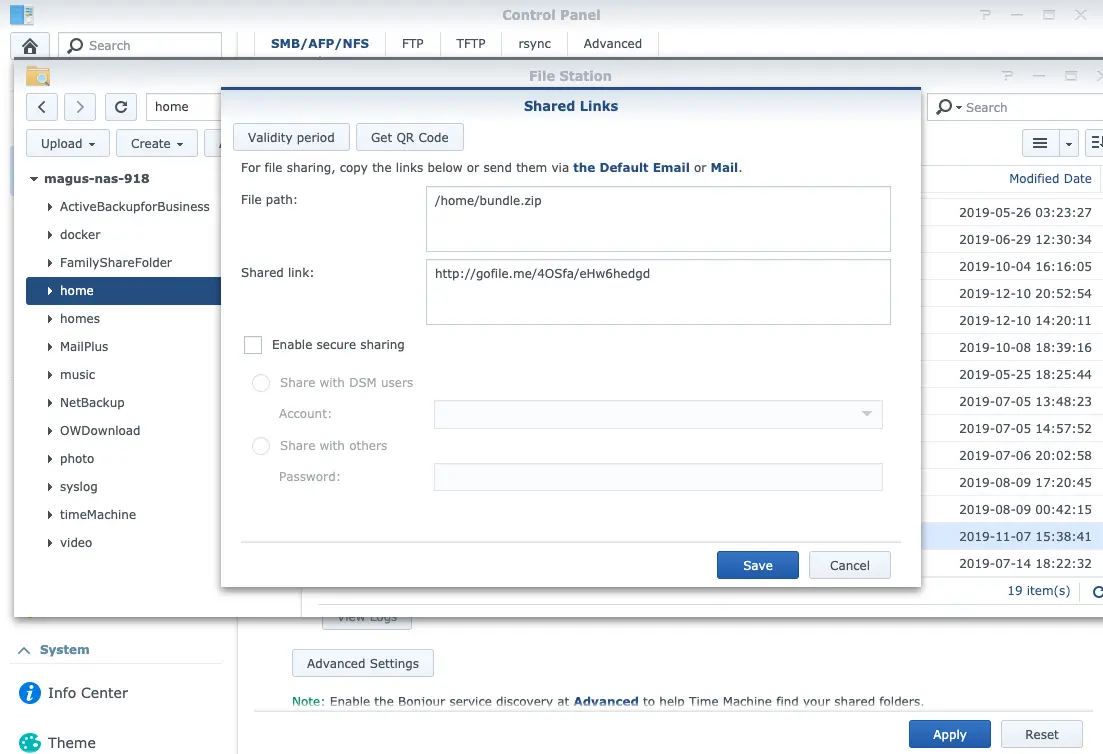
Backup: PC Data
I think backup data of PCs is the essential work of Family NAS. Isn’t it?
Mac
Time Machine is the exclusive backup service of MAC which saves history versions of files for restore(just as sitting in the time machine). Here are steps:
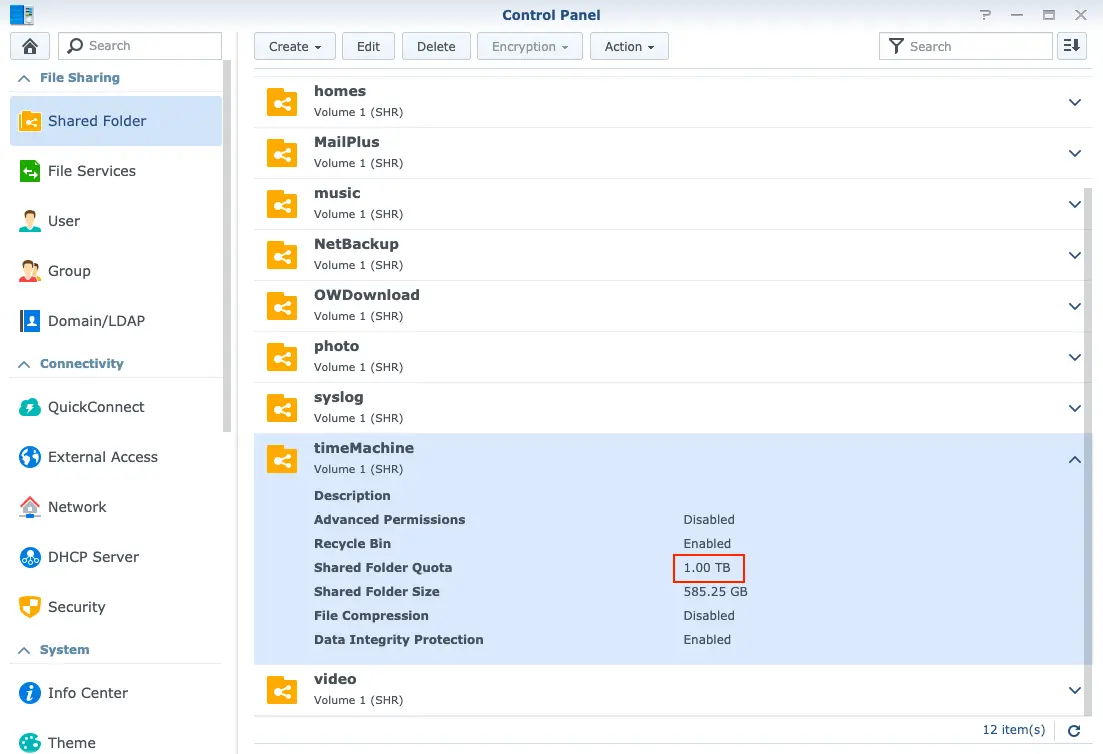
- Create one specific user and shared folder(Fig.10). Remember to set quota for Time machine will not stop before eating up all available space
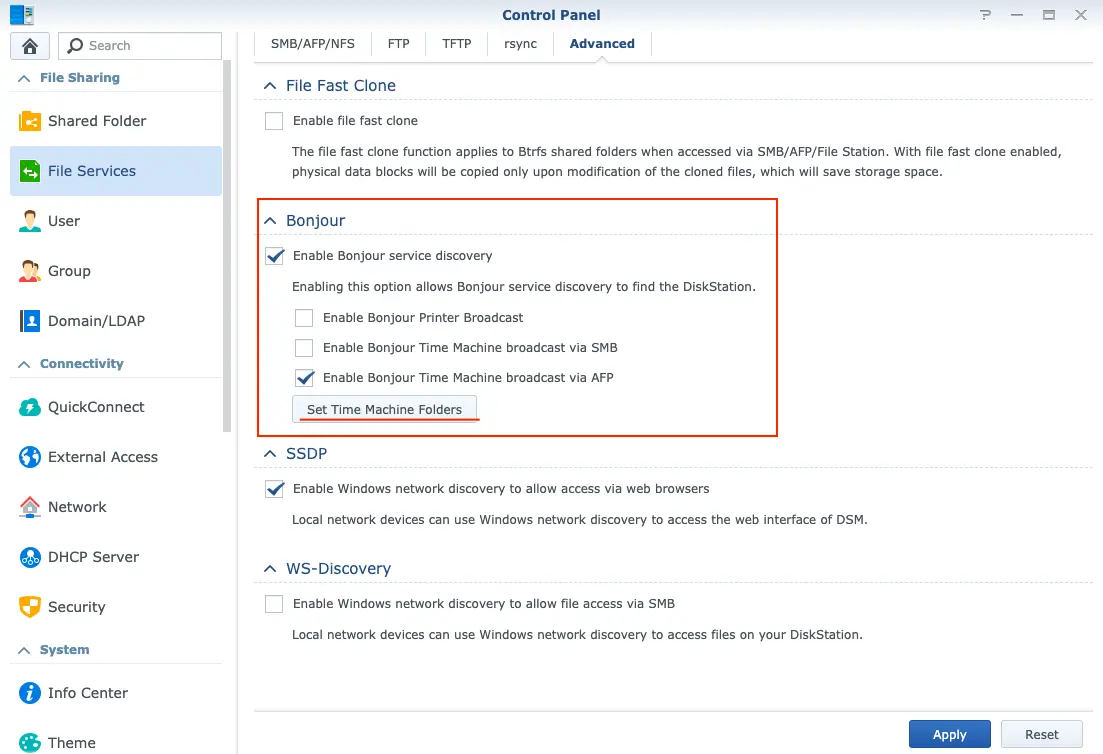
- Set Time Machine Folders in Fig.11
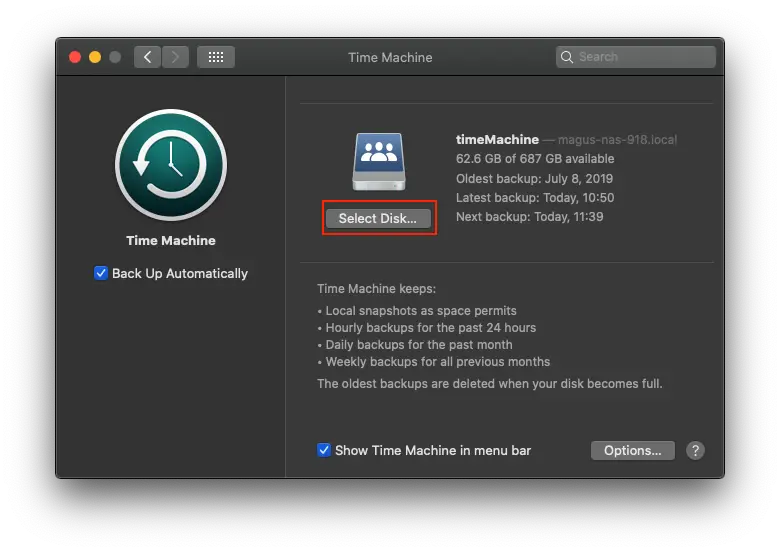
- Set Target in Mac(Fig.12)
Windows
Windows has no Time Machine but Synology provide the same function through Active Backup for Business. Also steps here:
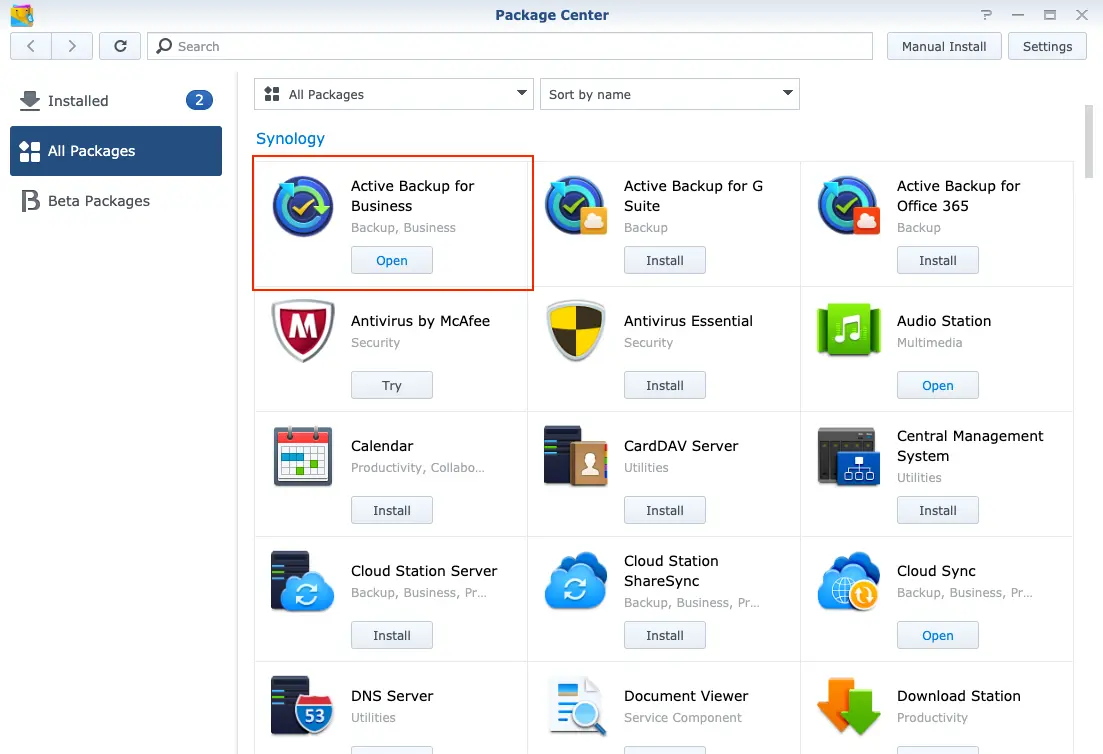
- Install Active Backup for Business(Fig.13)
- Create one specific user and shared folder
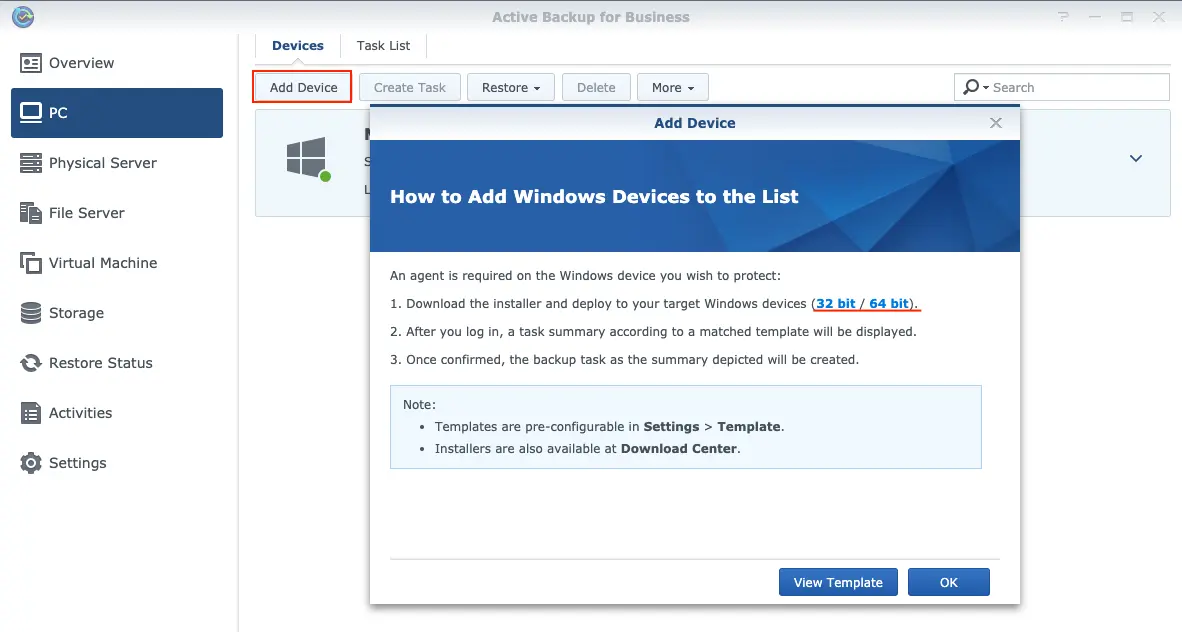
- Download then client(Fig.14) and install it on the target machine
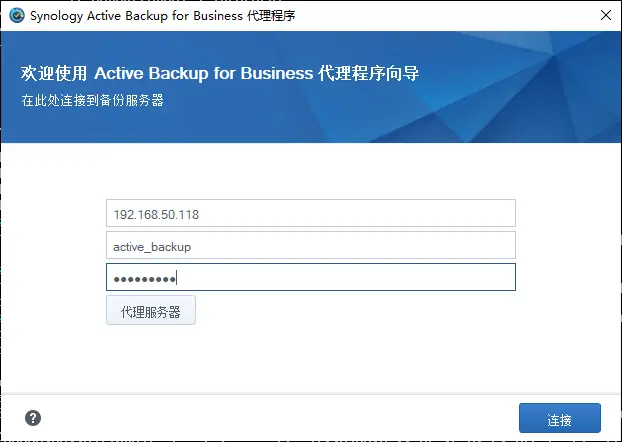
- Open the client and login in target machine(Fig.15)
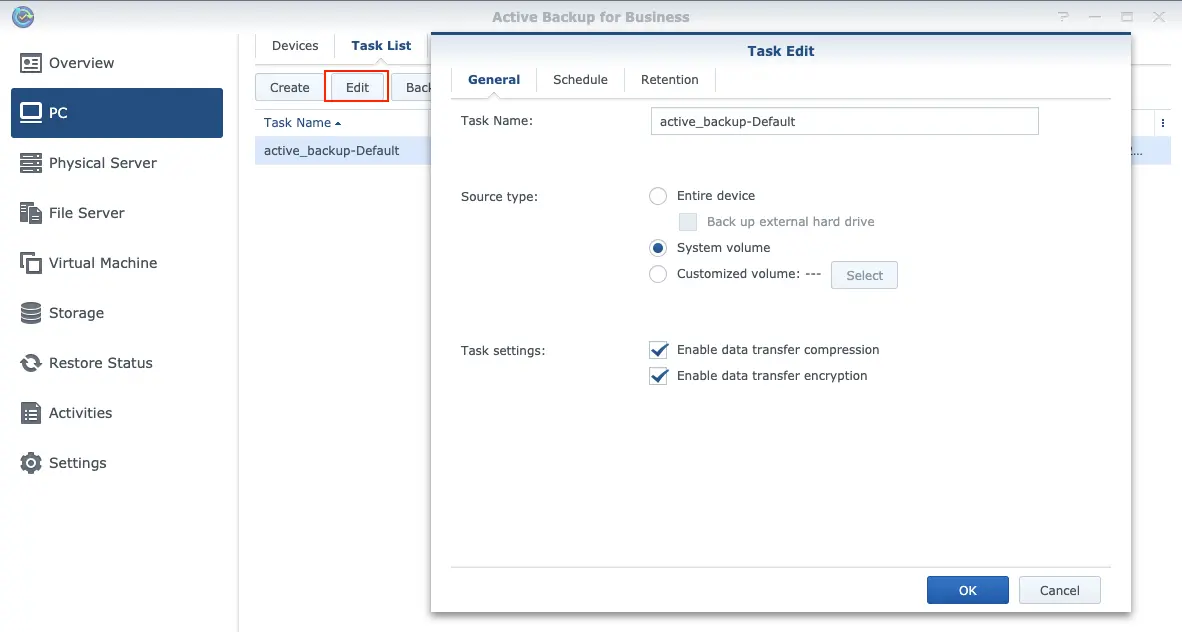
- Adjust details of tasks in DSM(Fig.16) such as source type/schedule/retention and so on
In addition to PC, Active Backup for Business is powerful to backup virtual machines or servers. You can search and restore history versions of files in Active Backup for Business Portal after successfully backup.
Conclusion
This post tells the story of the permission model and file sharing/backup method in Synology NAS. Next post I will introduce some apps about file sync.
See you ~